Monday, December 29, 2014

Creative Packaging for Homemade Gifts (Bath Powder)

This post is from when I was creating other bath products (here) with my grand daughter Alybeth. So this is rather late, as I just found the photos I thought were lost, but hopefully it can be useful later on.

We made our own bath powder allowing the fragrances to set for a week before packaging.

As far as containers go, they needed to be economical for Alybeth to give them as gifts for family and friends, so we tried to buy items that would keep the cost range at around $5.00.


Price wise these are a very good start. 
I bought several sets of salt and pepper shakers for a $1.00 a set at a discount store.


This design seems to disguise the fact that it is a salt shaker and looks cute as well.


The items used to make the snowman powder container in the previous photo are these:
 A salt shaker, a snowman face and buttons printed on card stock and formed into a sleeve to fit around the shaker.  The hat was made using a baby sock. To hold the hat in place and also section off the hat's shape clear hair bands were used. The bell is attached with jewelry findings. The scarf is just striped tee shirt material with the ends cut into fringe.


Using a glue gun to attach ribbons, stickers, and charms, here are a few more designs options for more elegant yet still price conforming containers.


It's important to keep the powder from getting away before it gets to it's destination so
 a decorative envelope seal was used to cover the holes. 
On the ones below a seal or a small piece of tape was added to the rim before the top was screwed on.


For a container with a more elegant look, I embellished a decorative glass salt shaker with rhinestone trim and ribbon. It looks great on it's own as well. 
 I bought this set at a discount store, so using just one as a gift will still be slightly over $5.00, but to be fair I already had the ribbon and rhinestone trim on hand from previous crafts. 


 We made bath powders in many different scents so I decided to use the leftover bits by pouring 
them into these mini shakers and packaging them together as samplers.
  I bought these shakers as a set of 12 for about $7.50 at a discount store. A package of four is well under the $5.00 limit.
Note: Take the tops off and cover with a piece of tape to keep the powder from getting out, replacing the tops of course.


This is the only photo I found of the penguin designs we did. 
The smaller penguin is again a salt shaker from the double pack at a discount store. The larger penguin design printout is covering a foaming hand soap container. We actually made our own soap and added a gingerbread type fragrance.


♥ Happy Decorating ♥

Tuesday, December 23, 2014

Christmas Cookies - 2014 Designs

I had some left over dough and icing from a cookie decorating party with my kids and grand kids, so I decided to have some me time in the kitchen and play with some designs I've been wanting to try.


Icicle cookies.
These are fancier and have more dimension than the ones I did years ago.


I used a carrot cutter for this one, and forgot to round off the top before baking. I decided to decorate it anyway figuring I could always cover it with a snowflake cookie later.


Snowflake with a decorative center indentation.


Ornament cookie with a decorative center indentation.
I'm not really liking the shiny center.


Ornament and simple tree cookies.
I like the center of this ornament much better.


Two variations of the decorative center.


♥ Happy Decorating ♥

Sunday, December 14, 2014

MIni Christmas Cookies - Packaging

Lately I've been using more power tools than flour tools as the unrelenting joys of home ownership have taken precedence over everything else while I work to get my house into shape to sell.

I did manage to get some mini Christmas cookies made to add to Christmas gift baskets, and I hope to be able to play some more in the kitchen during the holidays. Maybe I'll let that be my present to myself.

I'll admit that mini cookies can sometimes be more difficult to ice than a larger cookie, but I love how cute they look all packaged together.


These are placed in pretzel bags and sealed in between. This will help to keep them from breaking I hope. I stapled on a hang tag made with a scrapbooking punch. A decorative envelope seal covers the staple for a more finished look.


I'll cover this with a cellophane bag and bow, but due to light glare I photographed it without.


A half pound candy box of Christmas minis.


♥ Happy Decorating ♥

Sunday, June 8, 2014

Cookie Tools - Update

As I've been slowly getting back up to speed with my cookie decorating I realized that it might be time for an update on my not-your-everyday cookie decorating tools. For a look back on some more of my unconventional cookie tools check (here).

As a disclaimer I will say the tools below work for me, but they may not work for others, but thought I'd share just in case someone finds something useful.

This is my cheap DIY bottle drying rack made with materials I had on hand. Basically it's a 1" thick sheet of Styrofoam poked with skewers and sandwich picks to suspend everything for better air flow.
 I add cut lengths of soda straws slipped over the picks if my icing tips are too big. (front row r.)
I can also dry my detail paint brushes as well.

Whenever I had to do the dreaded "cookie in a bag with a bow thing", I used to grab my EZ bow maker board.
I kept using the old board for years even though it was really too narrow. It's much better suited for making bows.
Finally I got wise and realized I've got skills and power tools sooooo......
With a chop saw, a drill, leftover dowels from oh so many diaper cakes, and scrap wood from a closet makeover, I already had everything I needed.
I cut the scrap piece down to 12 inches which is long enough for any cookie bag I want to tie, and as an added plus it makes an easy measuring guide to cut my ribbon to length. When I need a lot of ribbon I wrap it multiple times around and cut through both ends.
The 2 dowel pieces were cut to 4 inches and the tops rounded with sand paper. They were glued into 2 holes drilled a little less than 1/8 inch apart.

To use: I bag my cookie, twist the bag and slide it between the two dowels. Now my cookie stays anchored while I tie it.


A, B, and C are palette knifes.
I use A and B when lifting thin fragile fondant shapes after rolling them out and cutting. 
 C- is a lot thinner and more flexible so this is great for removing small icing transfers from the acetate backing I pipe them on.
D- is called a fluid writer or a gold pen when used for ceramic over glazes.
It comes in two sizes, this one being the small size for fine lines.
E- Usually comes with the pen to clean out the tip, and will work in a pinch to unclog piping tips. I've used it for 00 PME tips.
I use this pen for very fine lines, detail work, and even writing when I want to use white as well as gold and silver. Americolor airbrush metallic sheens seem to do well for this. Usually a drop or two right out of the bottle. Most of the other colors (gels and airbrush) are too concentrated to use right out of the bottle, so the color ends up being too dark.
When I want white, I use Americolor regular gel white food color as it is already quite thin.
There is a learning curve to this, but it's worth it for me to be able to write or detail with colors that I can't find as food color pens.


And last but not least - My new cookie bling toy!!!
There are many vacuum pick up tools out there, but this is one I thought would work best for the price and ease of use.
 It's marketed for picking up and placing beads or rhinestones using variable speed suction.
I've discovered it's great to pick up and place sugar pearls or dragees (cookie beads) when making my royal icing jewelry transfers. It made making all the jewelry transfers in my previous post go so much faster.
The suction will vary depending on how you turn the dial. Not shown is a rubber tip that can be added for the larger beads.
NO MORE TWEEZERS!!!
Note: Just make sure the item you're picking up is not too small as you don't want to clog the unit.

♥ Happy Decorating ♥

Thursday, May 22, 2014

Cookie Jewelry Icing Transfers - Part 2

Another royal icing jewelry transfer post. In this one I start out with crowns, bows, stars and some simple flower jewels at the top, and at the bottom of the post some cabochon type jewels. I make these as transfers for two reasons. The first being I can make them ahead of time as long as I seal them to keep air from tarnishing the dragees. The second is that where I live the dragees are to be used for non-edible decorations only, so I use just a dot of icing to attach them so they are easily removed before eating.
To help keep my sanity, especially when outlining with tiny pearls, I now use what I call a bead vacuum to place all those "cookie beads". It makes the job so much faster, and no more chasing those slippery spheres with tweezers. I will be talking more about this in my next post when I update my cookie tools.


Crowns, bows, stars, and flower type jewelry transfers.
Below I'll show a few basics for the crowns and bows.


This is my crown printout that I started with. I lay acetate or waxed paper over it and ice away.


Close up of two crown variations. I usually start with the lower edge following the shape with an icing line and adding sugar pearls or dragees as I go.
Then I add the larger colored pearls and fill in with smaller ones all while trying to keep within the outline.
 (Oops, looks like my paper shifted during the photo shoot)


    I first outline small areas around the shape with a line of icing and place tiny dragees or sprinkles adding more icing and sprinkles until the whole shape is outlined. Let these dry a bit (you don't want the lines to shift) before flooding with icing. Once flooded these need to dry overnight before using.
These can also be done by just outlining with icing, and flooding, but I wanted a beaded edge.


Cabochon type cookie bling!!!
The green and white diamonds with the gold beading in the second row are done with edible gold food coloring over white tiny sugar pearls. Not as shiny as dragees. They look more like old gold.
See the next photo for the basics. 


 To make the cabochons I start out with my ever present printout of whatever shape I'm doing covered in waxed paper or acetate.
I place icing around the outlined shape and add sugar pearls.
In between the pearls I add small dragees and let this dry a bit so the shape doesn't shift when I do the next step.
When the pearls have had time to set I flood the middle with icing and add a single sugar pearl or dragee, or a smaller shaped jewel like the diamond above. I make the smaller jewels a day or two ahead to give them time to dry so they can be added to the larger ones.
These larger jewels take a lot longer to dry and set up because of the icing thickness in the middle. They may seem dry on the top, but underneath they could still be wet.
 If your icing tends to sink as it's drying, do the flooding in layers, letting each layer set up before adding the next one.


♥ Happy Decorating ♥


Tuesday, May 6, 2014

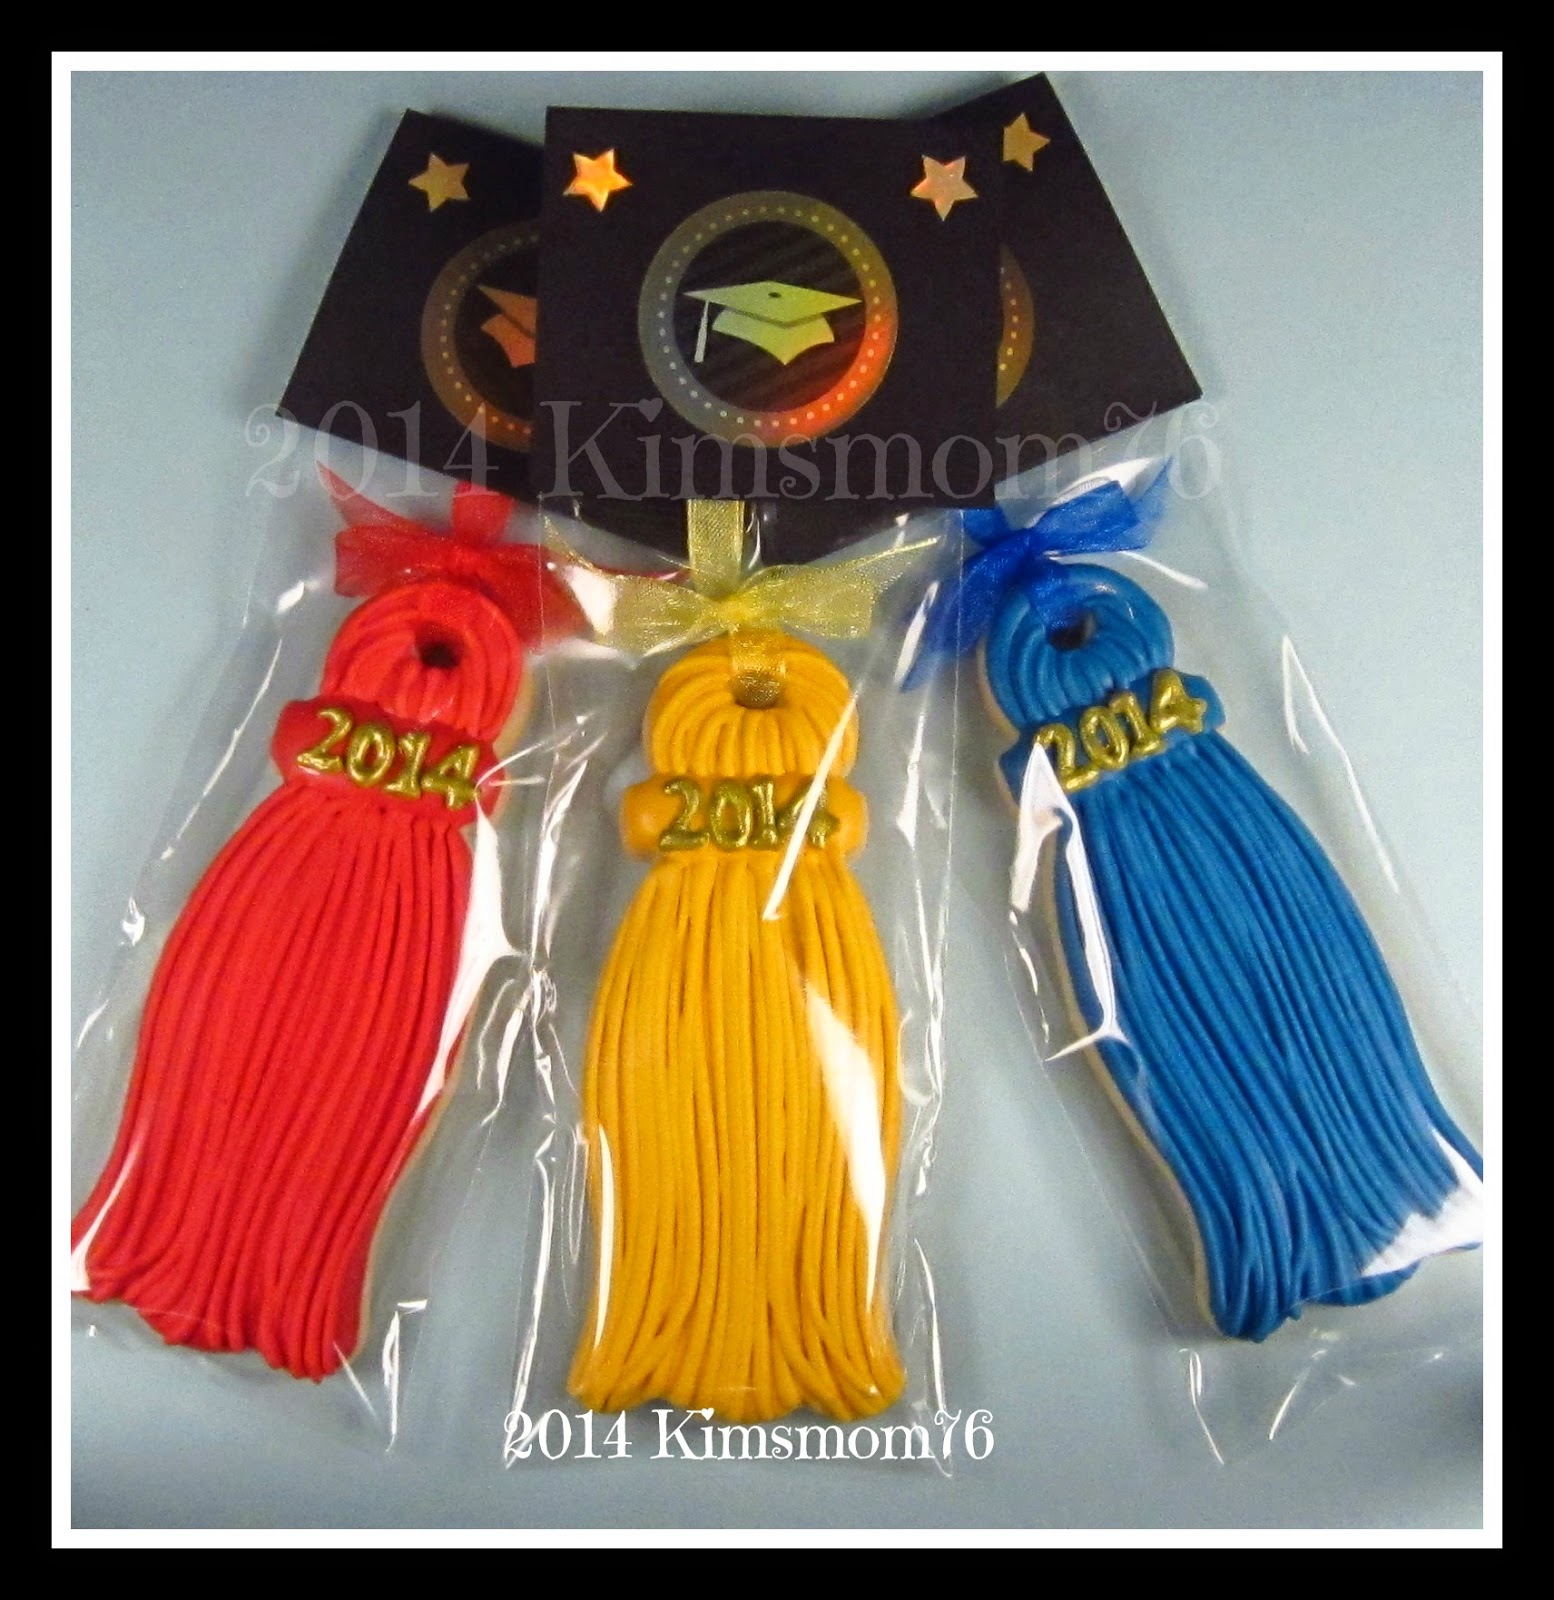
Graduation Tassel Cookies - Tutorial

I recently updated the graduation tassel cookie I designed 4 years ago (seen here), and sent the design to Ecrandal cookie cutter company to have Eric make a cutter for me. You can now find it (here).

Eric makes and sells quite a few of my designs, and when I can I will link to the actual cutter on his site.
Gorgeous doesn't even begin to describe the heirloom quality of these cookie cutters, and over time I will be featuring step by step tutorials of my designs that Ecrandal offers in cookie cutter form.
Thank you Jamie and Eric!!!


What starts out as a simple line drawing on my end Eric meticulously transforms into a beautiful yet sturdy cookie cutter.
Because of the depth of the cookie cutter, and the angle of the camera, the cutter might give the illusion of being larger than the drawing, but Eric has always been very precise when making my cookie cutters, and it actually matches my drawing perfectly. And the best part.....no more hand cutting these. Yeah!!!


After rolling and cutting out my cookie dough I use a soda straw to to punch a hole for the ribbon I plan to add later.


Once the cookies are baked and cooled I flood the cookie in sections (left photo) allowing them to dry about 15 or 20 minutes before adding the the next sections. (right photo)
This isn't necessary, but it gives me a pattern to follow later, and adds more dimension.
 I leave the neck section untouched for now, and let the whole thing dry completely before moving on to the next step.


With outline consistency icing, I begin to add the strings of the tassel using the neck section as my starting point letting the lines flow to the bottom. I also add lines to the top. I leave enough space between the strings so they aren't touching as I don't want them to run together. After letting the first set of strings dry for about 10 minutes, I place additional strings until I'm happy with the overall look. 


I cut away the jagged icing edges near the neck, and flood this section with icing and let it set for a few minutes before adding the year numbers. I want them to lay on top of the icing without sinking into it too far. 


 This cookie shows the numbers I've added to the wet icing.
The numbers were made ahead as icing transfers and gilded while they were still attached to the acetate. It was easier for me to do them this way as the numbers are small and I wanted them as uniform as possible. I'll let this dry overnight before packaging them up.
Note: The numbers can be piped directly onto the cookie for all of you with mad piping skills and steadier hands.


All tied up, bagged and tagged.
I made the simple hang tag using black card stock and stickers.


♥ Happy Decorating ♥