Monday, November 5, 2012

Birthday Queen Cookies

I had the privilege to be part of a cookie exchange where each participant made cookies for another one's birthday. Well, the recipient I was assigned to was Dawn (Kneadacookie). No pressure.
NO PRESSURE!!! Yeah there was pressure!!!! Not only have I been a fan of her work since I first saw it on Cake Central back in 2007, she actually owns a bakery where she makes cookies and other bakery goods for a living.
Anyway, after months of wondering what I was going to make her, I finally got to work and
designed the following Birthday Queen themed cookies.


Royal Banner


Birthday Queen
I'm embarrassed to say I actually sent her the wrong cookie. I accidently sent a cookie that was unfinished, lacking the darker outlines for the facial features and the ribbons. I don't think I gilded the crown accents either.
I didn't notice that fact until I'd boxed them all up and sent them out. I found this cookie the following day still sitting where I had photographed it. The only thing I can say in my defense is that I finished boxing them up at 1:30 in the morning so my husband could take them to the post office.
I'm so sorry Dawn. Here is the Cookie Queen you should have gotten.


Special birthday plate cookie


Petit four cookies


Mini crown cookies


And for those of you wondering who sent me cookies. Here they are. These are cookies made for me by Pam also known as CookieCrazie, another cookie designer I have admired for years. I got to see these beauties up close and personal when I received them back in July for my birthday. What a treat! Thank you again Pam.


Happy Decorating

Monday, October 22, 2012

Halloween Cookies for Girly Ghouls

I've been spending most of my time lately trying to get caught up with house repairs and sprucing up the yard, so there hasn't been a lot of spare time to blog. Plus I'm sure no one wants to look at photos of how to scrape paint, caulk windows and dig up old overgrown plants.
I did manage to squeeze in a little time to get these Halloween designs finished.
Let's say I was going for a Glam/Designer/Diva look with this collection.


 The broom on the left was made using a Christmas lightbulb cookie cutter, while the broom on the right is a handcut design. Normally I just attach a twizzler candy over the cookie stick as an added treat, however after seeing Sweetsugarbelle's post (here), I decided to follow in Lisa's bearfoot steps and use these cute straws instead.


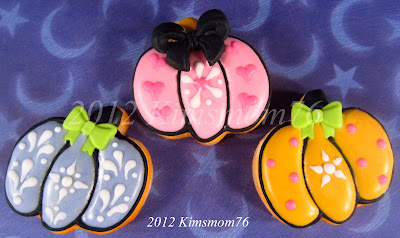
Dolled up little mini pumpkins.


Diva Witch hats. The hats are a combination of two designs. The brim of my old witch's hat (here) and the top of one of my Santa hats (here). The bats were cut with mini cutters.


This year's Halloween collection


Happy Decorating

Monday, October 15, 2012

Edible Icing Eyeballs- Tutorial

While trying to think up ways to use up my leftover royal icing I remembered seeing a darling photo from Andovercookiemama (seen here) about making candy dots, and thought with a couple of added tweaks and colors these might make cute Halloween treats for my grand kids.


I started out making very simple eyes using the came-with-the-computer paint program. Here I show the progression starting from left to right. For this set the icing eyes will be just the iris and pupil. 


With the background flooded in black they look even more spooky don't you think?


I printed out the eyes onto card stock and layered a piece of acetate over it to pipe the actual eyes onto so they'll be easy to remove and eat later. Waxed paper can be used as well. The icing is about 15-20 second icing which is thick enough to hold the rounded shape, but not form peaks. I started with just the iris color here since the whites are part of the background. I formed a rounded ball of icing over the corresponding color on the printed sheet and added the black pupils while it was still wet.  White highlight dots will be added later.


Here I'm showing how I pipe the candy eyeball "dots" that were put into long pretzel bags. I preplanned the size and the circle placement in my paint program and printed them out onto card stock. Again a piece of acetate was added to pipe the eyes onto.
Starting with white I make a ball of icing following the printed guide.


     I follow with the iris color while the white was still wet. The black pupils were then added the
      same way.  I let these dry overnight before adding the last detail. If they stayed this shiney I wouldn't need the white detail dot.


I added the white highlights using white Americolor food coloring and a ball tool that came in a set of 5 different sizes.


Here they are all packaged in both a 2" wide pretzel bag and a larger 4" wide cookie bag.
Now I realize that there is nothing new about the actual icing eyes, but I thought the added background was kind of a fun tweek to the packaging.


I had extra eyes and used them to make some chocolate covered spoons.


♥ Happy Decorating ♥