Tuesday, May 6, 2014

Graduation Tassel Cookies - Tutorial

I recently updated the graduation tassel cookie I designed 4 years ago (seen here), and sent the design to Ecrandal cookie cutter company to have Eric make a cutter for me. You can now find it (here).

Eric makes and sells quite a few of my designs, and when I can I will link to the actual cutter on his site.
Gorgeous doesn't even begin to describe the heirloom quality of these cookie cutters, and over time I will be featuring step by step tutorials of my designs that Ecrandal offers in cookie cutter form.
Thank you Jamie and Eric!!!


What starts out as a simple line drawing on my end Eric meticulously transforms into a beautiful yet sturdy cookie cutter.
Because of the depth of the cookie cutter, and the angle of the camera, the cutter might give the illusion of being larger than the drawing, but Eric has always been very precise when making my cookie cutters, and it actually matches my drawing perfectly. And the best part.....no more hand cutting these. Yeah!!!


After rolling and cutting out my cookie dough I use a soda straw to to punch a hole for the ribbon I plan to add later.


Once the cookies are baked and cooled I flood the cookie in sections (left photo) allowing them to dry about 15 or 20 minutes before adding the the next sections. (right photo)
This isn't necessary, but it gives me a pattern to follow later, and adds more dimension.
 I leave the neck section untouched for now, and let the whole thing dry completely before moving on to the next step.


With outline consistency icing, I begin to add the strings of the tassel using the neck section as my starting point letting the lines flow to the bottom. I also add lines to the top. I leave enough space between the strings so they aren't touching as I don't want them to run together. After letting the first set of strings dry for about 10 minutes, I place additional strings until I'm happy with the overall look. 


I cut away the jagged icing edges near the neck, and flood this section with icing and let it set for a few minutes before adding the year numbers. I want them to lay on top of the icing without sinking into it too far. 


 This cookie shows the numbers I've added to the wet icing.
The numbers were made ahead as icing transfers and gilded while they were still attached to the acetate. It was easier for me to do them this way as the numbers are small and I wanted them as uniform as possible. I'll let this dry overnight before packaging them up.
Note: The numbers can be piped directly onto the cookie for all of you with mad piping skills and steadier hands.
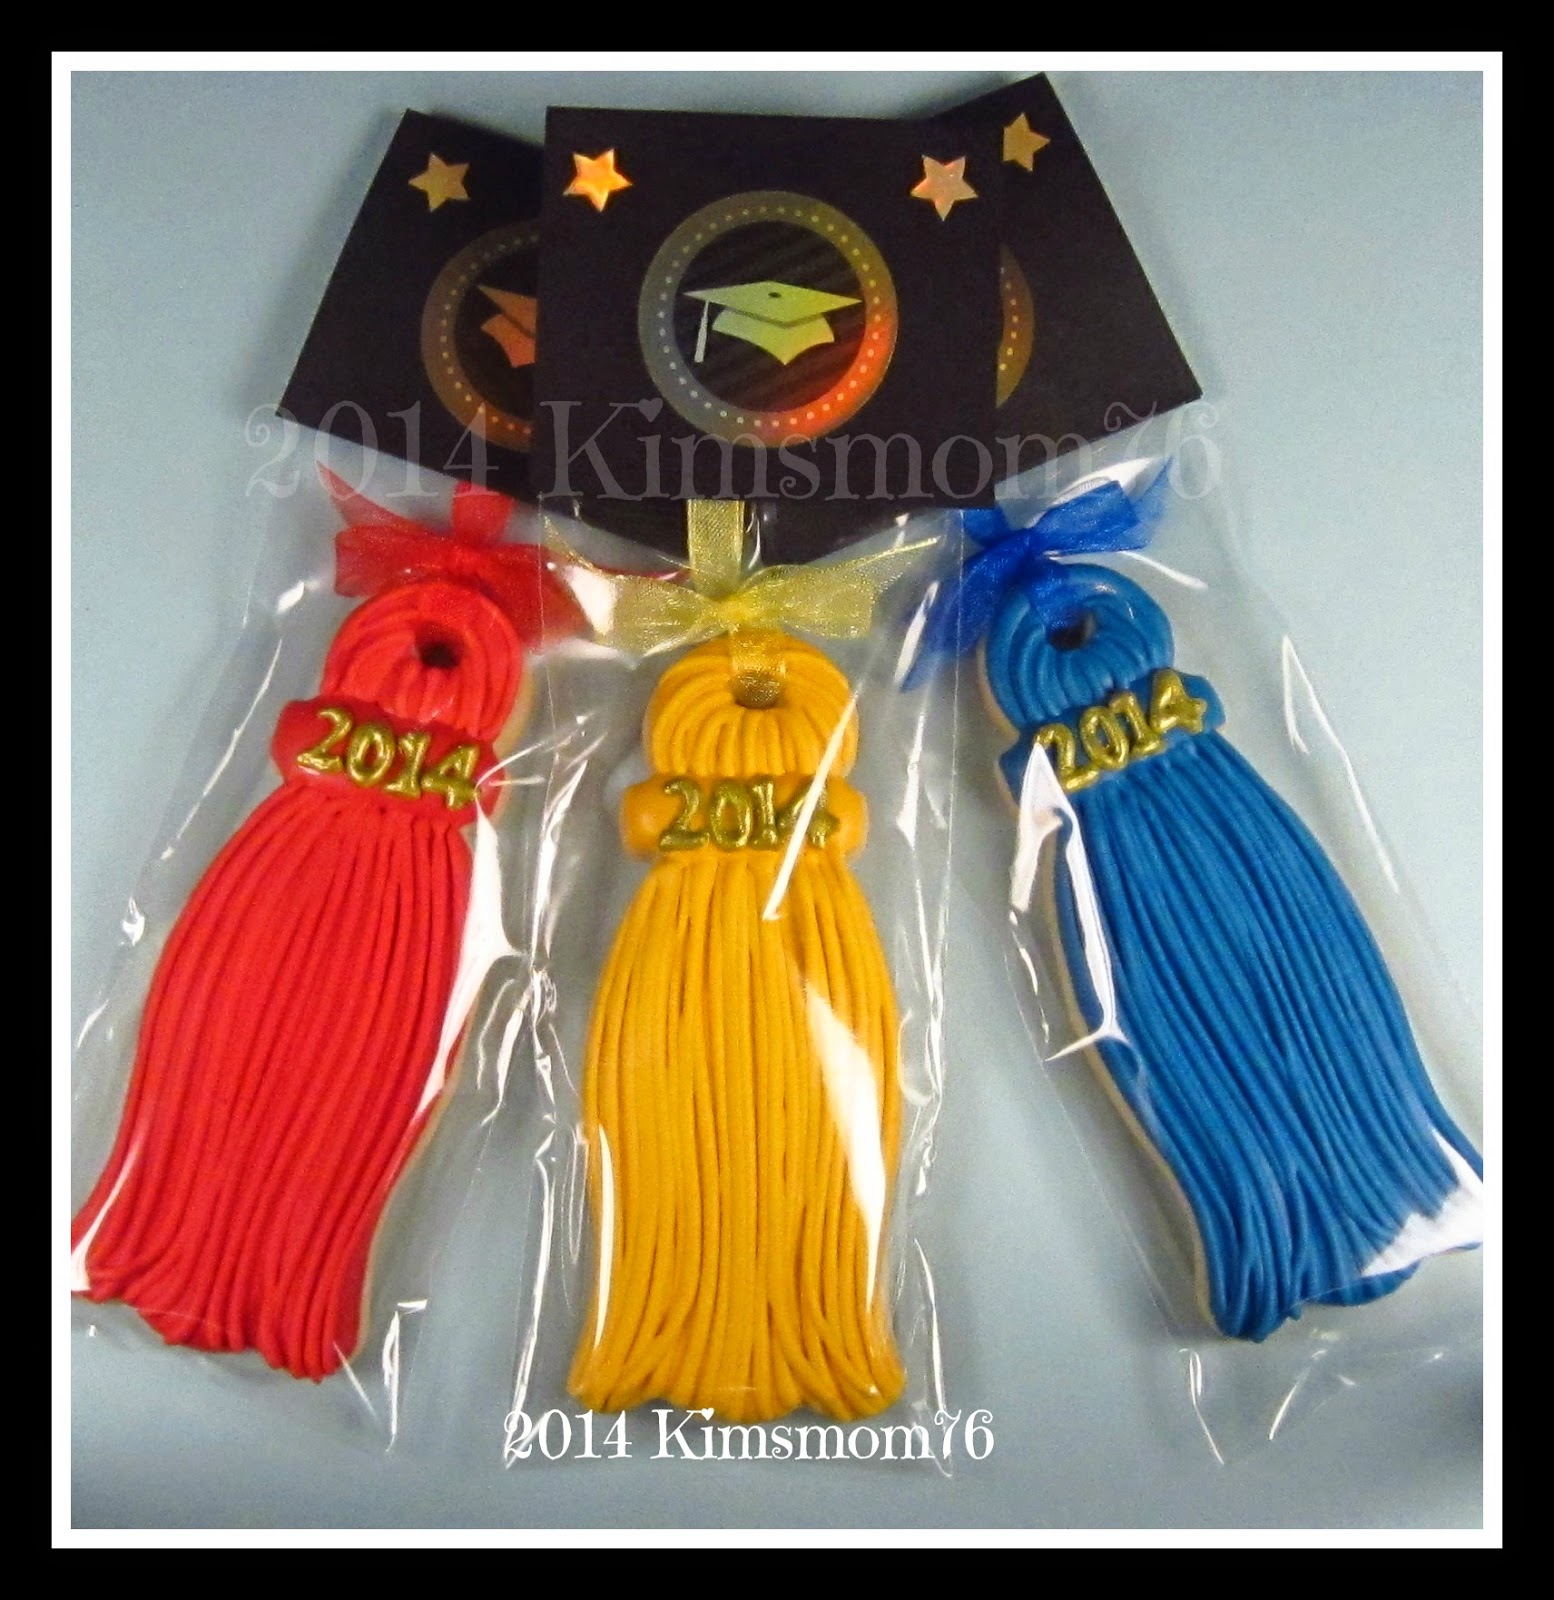


All tied up, bagged and tagged.
I made the simple hang tag using black card stock and stickers.


♥ Happy Decorating ♥

Wednesday, December 18, 2013

Handmade Ornaments - Candyland Christmas Tree

I'm pretty sure I've been voted off the Island by now. Cookie Island that is.  I haven't done any creative cookie baking for almost a year. Too many other projects, not really blog worthy, took precedence. Hopefully next year I can get into my cookie groove again.

Recently, like millions of others, I did manage to get into Christmas decorating mode. While in the process of getting out the decorations this year I decided I finally wanted to start the design process for a candyland themed tree. Having collected numerous sweet themed ornaments over the years, I finally felt I had enough to start putting together a small tabletop version.

In an attempt to keep my creative juices flowing I made a few handmade sweet treats to add to my store bought ones. As usual I seem to have more projects I want to do than time to do them.


A work in progress.
 I'm not completely happy with this one yet. 
It's way too jumbled and needs a lot more tweaking or editing, but I think it's off to a good start.
Below are a few of the ornaments I made to add to the ones I already had.


These simple, easy to make gumdrops will be used to fill in and add sparkle.
These were made by rolling and flattening styrofoam balls into gumdrop shapes, then painting and gluing on transparent glitter. I think I'll use smaller sizes and make them into either sprays or garland next time.


I absolutely fell in love with the fake rock candy sugar sticks I saw at the Breakfast 4 Dinner blog and knew I had I found my next project. Instead of  beads, I used what was labeled as "pirate jewels" found in the party section of Hobby Lobby. They look like those mini ice rock table scatters used for weddings.
I just followed Loraine's instructions found (here). They look pretty darn real don't you think?
Unfortunately there were only 4 colors in my bag of "jewels", so I'll need to check wedding supplies for more colors next year because I like the sparkle these add to the tree.


These fake brownie bites fooled my husband, a die hard chocoholic. I thought he'd cry when I told him they weren't real. I found the instructions for these (here) from Mark being Mark on youtube when I went searching for fake candy and cake tutorials. I decided not to add the flowers or the plate to the ones on my tree. I have some boxed candy truffles in the works, but they may have to wait until next year.


♥ Happy Decorating ♥

Friday, November 22, 2013

Creative Packaging for Homemade Gifts (Bath Salts)

With the Holidays coming on fast and furious my dining room looks like a craft store exploded in it. Right now my table, the floor, and almost every other flat surface is covered in ribbons, beads, glitter, bath powder and salts as I try to make ornaments with my daughter Kim, and figure out different gift packaging ideas for homemade bath and body products at the same time.

I'm showing just a few options I've started for packaging homemade bath salts.  I'll be working with one of my grand daughters at a later date helping her to make gifts, and wanted some prototypes finished for her to see.

My main goal was trying to keep costs down, but still have them look nice rather than tacky and cheap. Hopefully I accomplished that.

These came in for under $5.00 each except where noted.

As a disclaimer I will say I am a crafter, make that with a capital "C". I have decades (ask my kids) worth of ribbons, trims, flowers and what-not left over from other projects so it's hard to accurately add in the cost of all of those things I might have used. Just remember discount and dollar type stores as well as coupons are your friends.


My version of a bath cupcake.
This small gift only has enough bath salts for a single use, but the battery operated tea light (not visible here) will make it a useful gift later on. The monogram letter style I had initially (no pun intended) wanted to use was more expensive (just the one letter) than the candle holder, so I went with this one instead. It was part of a whole alphabet set with duplicates of some letters.


Here are the components. 
A bath glove, battery operated votive candle and holder, bath salts, a ribbon, and a pretty snowflake sticker.
The bath salts are in a baggie I twist tied to close. The excess baggie was cut short and covered with a decorative envelope seal. The bath glove (shown flat here) was rolled up to form a rose around the tea light. I also added a decorative monogram sticker (which I forgot to add to the photo) to the glass votive.


This is an upscale version using a nicer tea light holder. It still has a single portion of bath salts, along with a battery operated tea light wrapped inside the rolled rose body glove. The flowered jewelry pin adds a nice touch and becomes an added gift. The top hat candle holder was $3.00 and the pin cost about $4.00 at a discount store, so this will be higher than the $5.00 I was going for. 


Here's an even less expensive way to go using the items shown in the picture below.


As you can see the components here are just a nut cup, a bath glove, a single portion bag of bath salts, a decorative paper sleeve to go around the nut cup and a reindeer button. This paper sleeve is just one of my old cupcake collar designs, but Christmas themed scrap-booking paper would work too.


This one was inspired by the cocoa cone. The bath salts are placed in a separate sealed disposable decorating bag and the excess bag trimmed short. This is placed into a second bag adding the bath pouf on top. The whole thing is tied with a ribbon and ornament/tag. The sticker on the front is an envelope seal. 


A Dollar Tree Store find with added trim, ribbon and a snowflake sticker.
This holds about 3 portions of bath salts. A snowflake pin could be added to the ribbon instead of the sticker for an added little gift if you don't mind upping the cost.


I've seen variations of this idea all over the place. 
This is made using a plastic soda fountain glass, homemade bath salts, a bath pouf, Christmas straw, bell, ribbon and sticker. I sealed the salts inside a baggie before adding the bath pouf.


I have also seen many different design versions of this one as well. A plastic Christmas ornament filled with bath salts. I added ribbon and a decorative snowflake sticker. Once all the salt is gone, it can be filled with fake snow and hung on the tree. 
This one will need to be packaged with the cap upright as I couldn't find a way to get a really tight seal due to the way that prong-hanger-tension-thingie is going through the cap. 


For the Princess on your list. 
Without the bath salts and pouf this would work for an actual cupcake as well.


The components for this are a small domed covered drinking cup, bagged bath salts, a bath pouf, 2 curly ribbon hair clips, a paper party crown and a plastic party favor ring. 

That's it so far, and forgive me for being away for so long.

♥ Happy Decorating ♥