Showing posts with label Ecrandal cookie cutter. Show all posts

Friday, February 6, 2015

Pirate Cookies

Pirate cookies are on the agenda today. I'm taking you back several years to revisit two pirate cookies that will now be available at Ecrandals as cutters along with a pirate hat. 

I can't tell you how exciting it is to open a box from Eric and Jamie and find my designs gleaming up at me. I stare at them and wonder how in the world I'm going to force myself to open the neatly wrapped packages and expose their bright shiny surfaces to the elements. Then reality hits me. It's because of these meticulously formed works of art that I don't have to hand cut these shapes anymore, and the packaging suddenly disappears.

The best part however is knowing that I will eventually be able to hand down these sturdy beauties to the ones that inspired them in the first place.


Here is the set all together. The Pirate girl (top) and hat (left) are the new cutters. The Pirate Boy (right) has been offered at Ecrandals for some time now.


Now for some design history.
The adorable little girl in the picture on the left is my grand daughter Annabelle at the age of 5 or 6. Way back when I was designing my Pirate Buddy cookie she asked if I could design a girl pirate for her. Since my grand kids are my biggest fans and greatest inspiration I decided to go one better and design a pirate girl using her image for the cookie right down to the freckles. I first posted the hand cut version (photo on the right) on my Flickr site in 2011.


It starts out as a line drawing that I refine in my computer's paint program.


The Pirate Girl cutter and baked cookie.


My quick way to add outline areas to decorate by cutting out pieces of the template and marking on the cookie with a food marker.


Finished cookie with a slight design variation.


A new addition to my Pirate Designs is this Pirate hat, adapted from the girl's hat with a rolled edge detail added.


The Pirate Hat cutter, and baked cookie.


The finished cookie.
I've designed them for a more girly pirate here, but this can easily be designed for a boy or girl.
The inner hat detail can also be eliminated for a larger looking hat.


And lastly my Pirate Buddy which ironically was my first pirate design.
The boy and girl pirates were originally designed and posted in 2011 hence the old watermarked date.


The Pirate Buddy cutter and baked cookie.


The finished cookie.


Finished Pirate Set


♥ Happy Decorating ♥

Tuesday, May 6, 2014

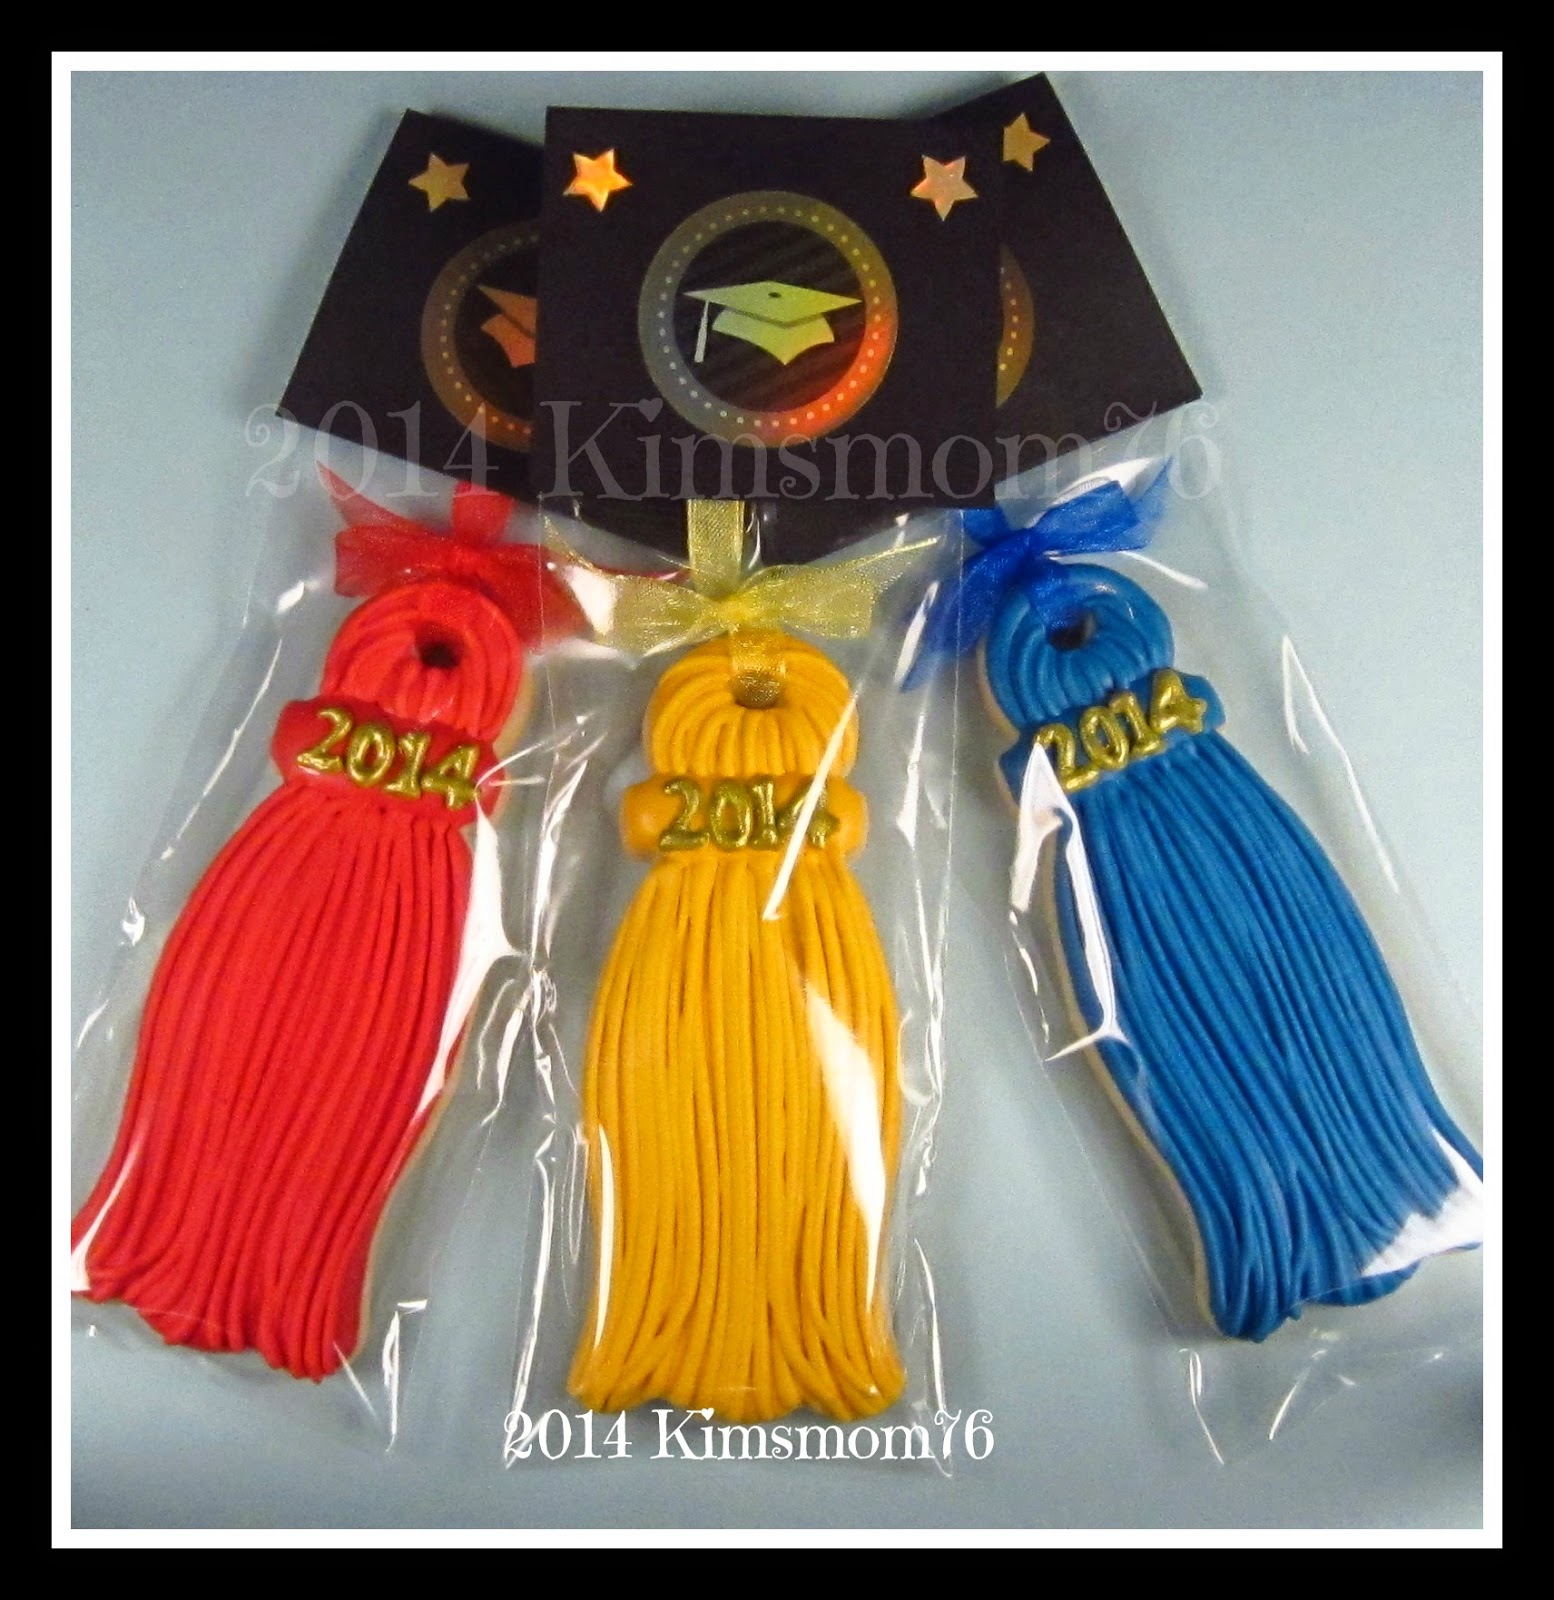
Graduation Tassel Cookies - Tutorial

I recently updated the graduation tassel cookie I designed 4 years ago (seen here), and sent the design to Ecrandal cookie cutter company to have Eric make a cutter for me. You can now find it (here).

Eric makes and sells quite a few of my designs, and when I can I will link to the actual cutter on his site.
Gorgeous doesn't even begin to describe the heirloom quality of these cookie cutters, and over time I will be featuring step by step tutorials of my designs that Ecrandal offers in cookie cutter form.
Thank you Jamie and Eric!!!


What starts out as a simple line drawing on my end Eric meticulously transforms into a beautiful yet sturdy cookie cutter.
Because of the depth of the cookie cutter, and the angle of the camera, the cutter might give the illusion of being larger than the drawing, but Eric has always been very precise when making my cookie cutters, and it actually matches my drawing perfectly. And the best part.....no more hand cutting these. Yeah!!!


After rolling and cutting out my cookie dough I use a soda straw to to punch a hole for the ribbon I plan to add later.


Once the cookies are baked and cooled I flood the cookie in sections (left photo) allowing them to dry about 15 or 20 minutes before adding the the next sections. (right photo)
This isn't necessary, but it gives me a pattern to follow later, and adds more dimension.
 I leave the neck section untouched for now, and let the whole thing dry completely before moving on to the next step.


With outline consistency icing, I begin to add the strings of the tassel using the neck section as my starting point letting the lines flow to the bottom. I also add lines to the top. I leave enough space between the strings so they aren't touching as I don't want them to run together. After letting the first set of strings dry for about 10 minutes, I place additional strings until I'm happy with the overall look. 


I cut away the jagged icing edges near the neck, and flood this section with icing and let it set for a few minutes before adding the year numbers. I want them to lay on top of the icing without sinking into it too far. 


 This cookie shows the numbers I've added to the wet icing.
The numbers were made ahead as icing transfers and gilded while they were still attached to the acetate. It was easier for me to do them this way as the numbers are small and I wanted them as uniform as possible. I'll let this dry overnight before packaging them up.
Note: The numbers can be piped directly onto the cookie for all of you with mad piping skills and steadier hands.


All tied up, bagged and tagged.
I made the simple hang tag using black card stock and stickers.


♥ Happy Decorating ♥

Monday, March 12, 2012

Top Hat Buddy for St. Patrick's Day - Tutorial

This St. Patrick's Day design is similar to the one I made for Ecrandal's cookie cutters. The cookie cutter can be found (Here) and has many different design options that I'll show at the bottom of this post.  Today I'll show how I make a leprechaun.


I outlined the area where the hat is going to be, and filled in the band with black and let dry.


When the outline was dry I filled in the face area with flesh tone icing. I like the face better without an obvious outline, but that's just me.


Using an orange red icing I filled in the hair after the face area was completely dry.


I flooded the hat area with green icing and sprinkled green sugar on top for a little sparkle.


I added the mouth, nose, and eye outlines using a fine tip edible food marker.


I filled in the eye outline with white flood icing and dragged it into the corners with a toothpick.


With flood icing I added the buckle and let dry. I really should have used outline consistency icing, but I got lazy and used this instead. You can see it's not as sharp as it would have been had I thickened up the icing.


I used a black food marker to fill in the eye area. I decided to sharpen up the area around the buckle with black outline icing.


A drop of white icing finishes the eye, and a fine line food marker details the hair and freckles.


I added petal dust to the cheeks with a Q-tip, and this little guy is done.


Here are the original cookies I made for Ecrandal. You can easily make a patriotic buddy, or a chimney sweep, or even a magician. The hat can be changed into a cowboy hat or bowler with some creative cutting.


Happy Decorating